
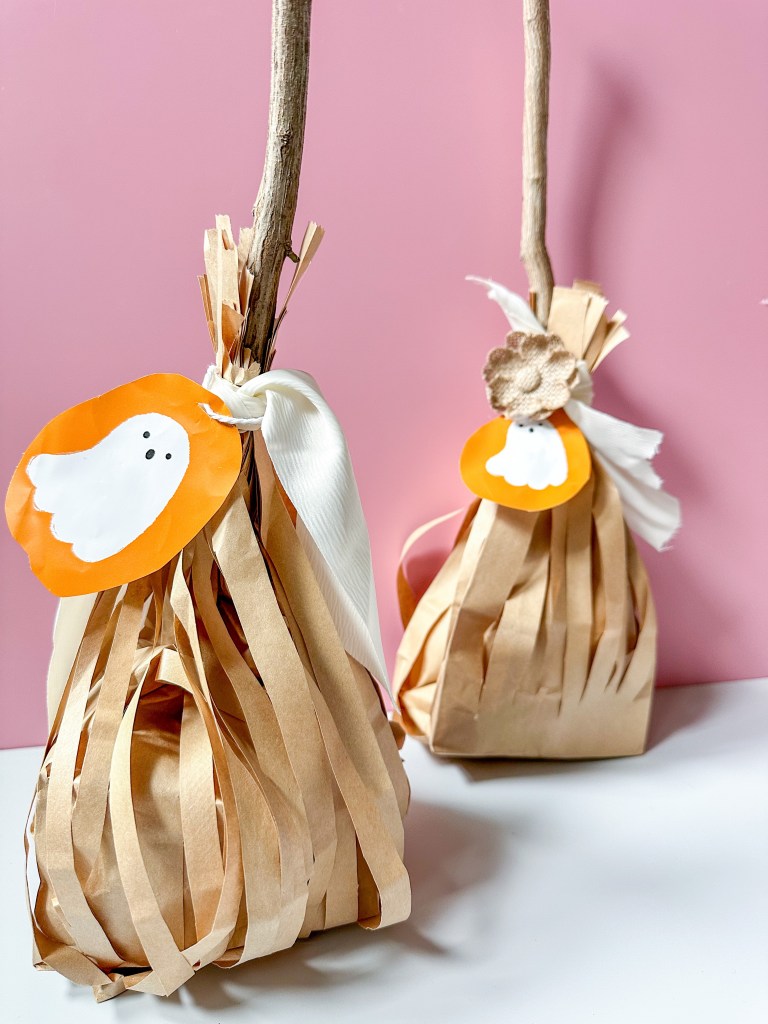
Witches Broom Goodie Bags
These have got to be the cutest little themed goodies bags I’ve seen in a while! Soo easy to replicate too. 10/10 Halloween craft for everyone!
I would say these would be great for classroom treat bags but I would make sure to use sticks that would be school appropriate, maybe even pencils, if you use a smaller bag.
Let’s get right into it shall we 🙂
What you’ll need… (per bag)
• 2 brown paper bags
• one small stick (foraged for it in our yard)
• scissors
• rubber band
• ribbon (optional)
• name tag (optional)
How to make them…
Take one bag and begin to cut fringe on the open end, about an inch and a half toward the center of bag. Set aside. Take second bag and begin to cut fringe (open end) close to edge of bag, leaving about 1/2 inch or so, uncut.
Open the second bag, laying fringe down on all sides on a flat surface. Place the first bag inside of the second bag, securing it nicely in the center. Place your goodies in bag. Once done, place stick in center of the goodie bag, gather fringe that is laying flat and bring together with goodie bag insert. Place rubber band over top of stick and tie fringe to the stick. If a rubber band is too difficult or snaps on you, you can opt to secure fringe with string. I like to secure fringe closer to the top portion so it would resemble a broom. If you secure in center of the bag, it cuts off room for the goodies and also doesn’t give off the same broom aesthetic. Once this step is completed, you can decorate bag with ribbon, string, name tags, or stickers. Please take a peek at video tutorial for visual.
That’s it! Save it this one for later 🙂
Comment below and let me know what you think of this Halloween craft!
XOXO, terri
